If your car’s battery is weak, you might turn the key (or push the button) and only hear a click. Or maybe nothing will happen. In that case, follow these steps to get your vehicle started.
There are two ways to jump start an engine: using jumper cables or a jump box.
An affordable high-powered jump box is not much bigger than a cell phone. They are fast, easy, and do not require the assistance of another running vehicle. A portable jump box is also a power bank that can charge small electronic devices. We recommend keeping one in your vehicle.
Jumper cables are also common. You should keep high-quality jumper cables in your vehicle in case of emergencies. Jumper cables should be at least 20 feet long and made of at least four-gauge wire with large heavy-duty clamps. Longer cables allow you to reach the vehicle providing the jump more easily.
Start the assisting vehicle before connecting the clamps. We recommend that the assisting vehicle run throughout the jump-start process. Some owner’s manuals state leaving the assisting vehicle off, while others state the assisting vehicle should be running before connecting the clamps. The main reason to start the assisting vehicle before connecting the clamps is to ensure that the assisting vehicle’s battery stays fully charged during the process.
If the assisting vehicle’s battery is weak (which would not be known), connecting the two batteries together could drain enough charge to keep it from starting. This does happen occasionally, leaving both vehicles dead. When properly connected, a running vehicle connected to a dead battery will not generate any additional shock to either electrical system that would not be present if the assisting vehicle is not running.
When attaching the clamps to battery terminals, remember that the red clamp is always positive, and black is always negative.
-
Always attach the positive (red) clamp to the dead battery first, then the live battery.
-
Then attach the negative (black) clamp to the assist vehicle’s battery and only then to the dead vehicle.
For safety, hold the clamps away from each other and away from the vehicles when attaching them. After a cable is connected, the other end of that cable is live. Never allow two clamps (positive and negative) to touch each other when connected to the battery.
Tips and Tricks
-
Turn off all accessories, such as the air conditioner and infotainment, on both vehicles.
-
Turn off stop/start (if equipped) on the assisting vehicle.
-
If the dead battery is heavily discharged, you may need to allow it to charge for a few minutes before trying to restart the vehicle.
-
After reviving the vehicle with the dead battery, drive it normally for at least 20 minutes before shutting off the engine. This ensures the battery receives a decent charge.
-
If your vehicle requires another jump start within a few days, your vehicle’s charging system needs servicing.
-
Many people connect the negative cable directly to the dead battery. This is not advised when using jumper cables. There could be a spark, which could be dangerous, when connecting the negative terminal. Instead, we recommend connecting the negative cable to a grounding point on the dead vehicle’s chassis or engine. A good ground point is not painted or insulated. You can also clamp to the bolt where the battery’s ground wire is attached. Check your owner’s manual for the recommended ground locations.
-
Some jumper cable sets have advanced features, including connection detectors that confirm the correct clamping connections. The technology is impressive, but we recommend basic jumper cables, which are the most reliable.
-
Be aware of your surroundings. Jumping a vehicle often occurs in high-traffic areas, which can be dangerous.

Most batteries are located in plain sight under the hood. However, many are hidden under trim panels or mounted remotely in the trunk or under the rear seat.

If you can’t locate the battery under the hood, check your trunk. Look for access panels like this one. The battery may also be under the spare tire cover or under the rear seat. Remote batteries can be harder to reach with jumper cables. In some cases, it’s not possible to connect jumper cables to them. Check your owner’s manual for the battery’s location and recommended jump-start process.

Sometimes, the inability to start a vehicle is not caused by a dead battery. It could be a loose or corroded battery terminal.
Cleaning and tightening a battery terminal can fix a no-crank issue. A loose or corroded terminal reduces the electrical system’s efficiency. Worn-out or heavily corroded terminals and wires should be replaced.

Some vehicles, notably those with remote batteries, have an access point for charging and jump starting. They are usually marked with a large red cap with a “+” or “Battery” label. They’re intended for jump starting, so they are prominent in the engine bay and covered with a red cap.
The access point is always live. It is directly connected to the battery via heavy gauge wire. Do not leave the access point uncapped.
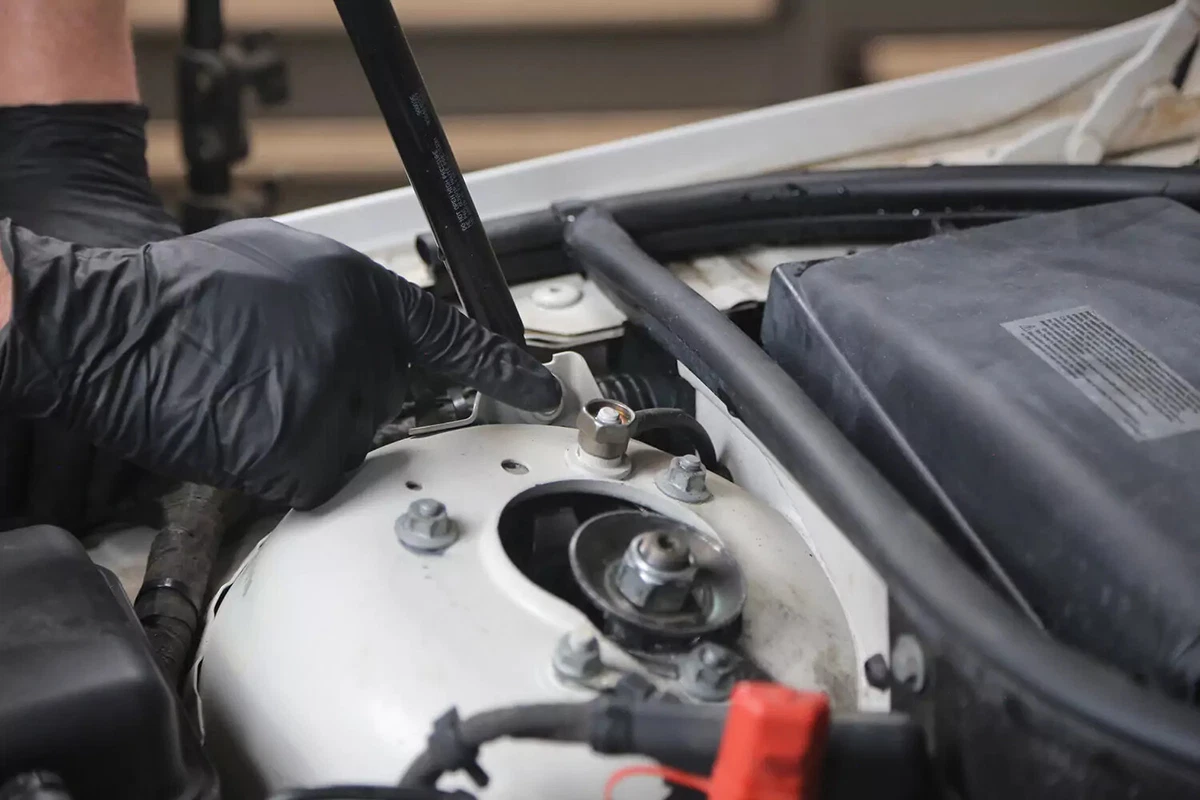
Find a grounding point, such as a large bolt or unpainted bracket attached directly to the engine or chassis. The ground should not have rubber bushings. The end of the battery negative cable is often a good place for a ground point. So are mounting brackets on the engine block.
Our demo vehicle provides a recommended ground point for jump starts—a large hex-head nut grounded to the frame.
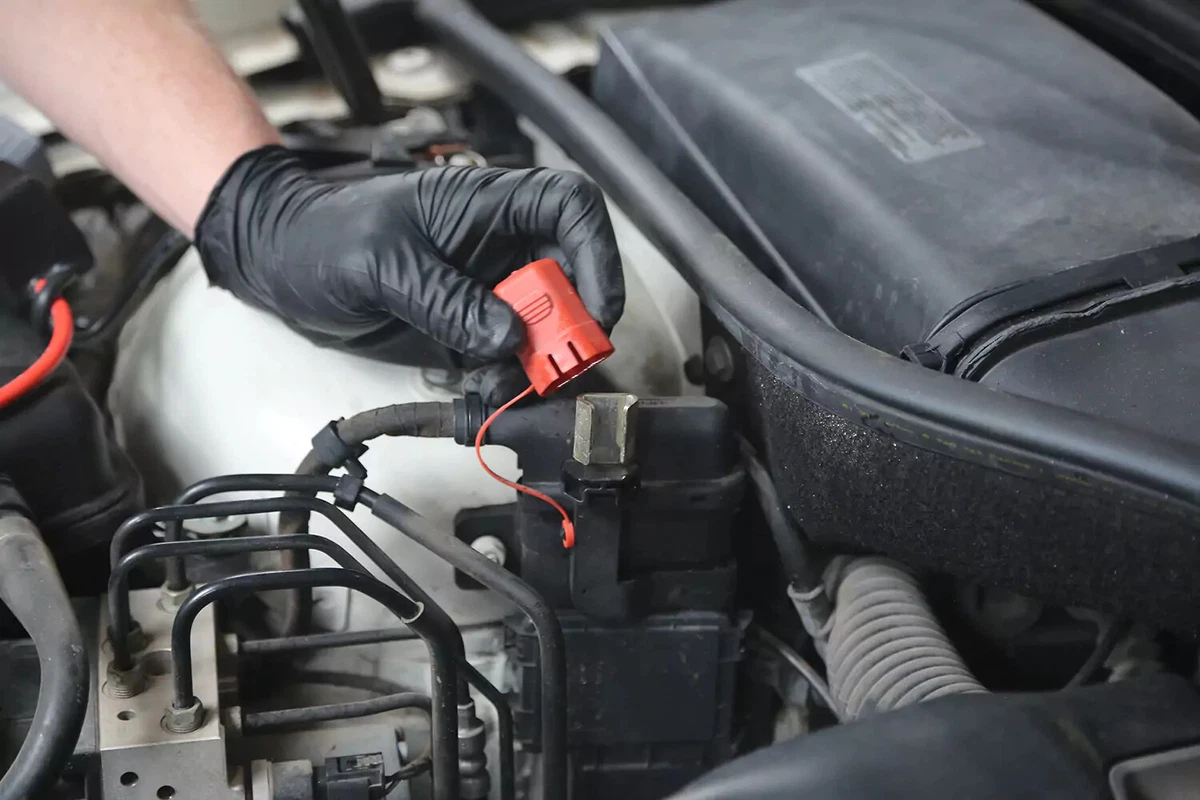
Remove the protective cap from the positive battery post or lug. If it is not attached with a strap, put it in a safe place so you can easily find it later.

Connect the positive side of the jumper cable to the positive terminal or access point on the dead vehicle first.
When connecting all the clamps, twist or scrape them to break through any corrosion on the terminal. This helps create a solid connection.

Start the assisting vehicle before connecting any cables to that vehicle.
Attach the unattached end of the positive cable to the assist vehicle’s positive battery post or access point.

Connect the ground clamp to the assist vehicle ground point. As mentioned above, scrape and wiggle the clamp on the ground point to ensure a good connection.

Attach the remaining ground clamp to the assisting vehicle’s battery or ground point.
When you connect the last clamp, the assisting vehicle’s engine should slow down for a moment. That shows that the alternator responded to a new draw on the charging system, and the alternator has kicked on. If the engine does not slow down slightly, check all the clamps for a good connection.
Rev and hold the assisting vehicle to between 2,000 and 2,500 rpm to ensure the alternator is at max output.
Let the dead battery charge for a couple of minutes, then try to start the dead vehicle. If it spins slowly and then stops, let it charge for another five to 10 minutes. Rev and hold the assisting vehicle to 2,000 rpm and try again.

After the dead vehicle has started, rev its engine to between about 2,000 and 2,500 rpm for a few seconds to ensure the alternator is charging. Then, disconnect the cables. Remove the negative clamp from the now-running dead vehicle first, then from the assisting vehicle. Finally, remove the positive clamps.
For our video demo, we removed both cables from a single car at once. That’s not the official method but it’s also perfectly fine. The sequence for disconnecting cables is not critical.
Here’s what is important. Do not let the clamps touch anything or each other during the process. Put the protective cap back on the access point.

This is a pocket-sized jump box. Although it’s small, this jump box provides a sizable 1,500 amps of jump-starting power.
There are many jump box designs and sizes, including backpack-sized units. Pocket packs like this one come with removable battery clamps for easy use and storage.

Leave the jump box powered off. Then, connect the jump box clamps to the battery or access point. It doesn’t matter which one is connected first because the box is not on yet.
Now, turn the box on. It might start with a switch or a button. Then, start the vehicle. When fully charged, a pocket box like this one can start a power-hungry diesel engine.
After the engine is running, turn off the box and disconnect the cables. Don’t forget to recharge the box for future use.
About the author

Share your feedback
This article is meant to provide general guidance only. Automotive maintenance, repair, upgrade, and installation may depend on vehicle-specifics such as make and model. Always consult your owner's manual, repair guide for specific information for your particular vehicle and consider a licensed auto-care professional's help as well, particularly for advance repairs.
Recommended for you
Find answers and inspiration-

How to Change a Car Battery
6 min read -
SBJ 1.2 Test Prod - Change a Car Battery Shari
6 min read -
Automation How to Change a Car Battery
6 min read -

Distributors 101
6 min read -

How to Replace Spark Plugs
7 min read -

How to Replace an Ignition Coil
6 min read -

How to Buy the Right Ignition Coils
7 min read -

Buying the Right Distributor Cap and Rotor
4 min read -

A Deep-Dive Guide to Ignition Wires
7 min read -

How to Replace a Distributor Cap and Rotor
5 min read -
When to Replace Your Car’s Battery
5 min read -

How Do Ignition Coils Work?
5 min read -

Ignition Wire Buying Guide
6 min read -

All About Your Distributor Cap and Rotor
7 min read -
What to Consider When Buying a Car Battery
6 min read -

How to Buy the Right Car Distributor
6 min read -

An Intro to Jump-Starting Your Car Battery
-

How to Replace an Alternator
11 min read -

How to Choose the Best Spark Plugs
5 min read -

Spark Plugs 101
7 min read
Explore more projects

How to Repair a Chipped Windshield
1 to 2 hours
Beginner
7 min read

How to Replace Brake Fluid
1 to 2 hours
Beginner
10 min read
How to Replace an Ignition Coil
Less than 30 minutes
Beginner
6 min read

How to Replace a Radiator Hose
Less than 30 minutes
Beginner
5 min read

How to Replace Brake Rotors
1 to 2 hours
Beginner
7 min read

How to Replace a Serpentine Belt Tensioner
Less than 30 minutes
Beginner
4 min read

How to Replace a Drive Belt
Less than 30 minutes
Beginner
5 min read

How to Rotate Your Tires
30 to 60 minutes
Beginner
5 min read

How to Refill Windshield Washer Fluid
Less than 30 minutes
Beginner
4 min read

How to Replace an Oxygen Sensor
30 to 60 minutes
Beginner
5 min read

How To Replace Differential Fluid
Less than 30 minutes
Beginner
8 min read

How to Replace Sway Bar End Links and Bushings
30 to 60 minutes
Beginner
6 min read

How to Replace Transmission Fluid and Filter
1 to 2 hours
Beginner
11 min read

How to Replace a Cabin Air Filter
Less than 30 minutes
Beginner
5 min read

How to Change Disc Brake Pads
30 to 60 minutes
Beginner
8 min read

How to Replace a Valve Cover Gasket
Less than 30 minutes
Beginner
7 min read

How to Change Windshield Wipers
Less than 30 minutes
Beginner
3 min read

How to Replace an Engine Air Filter
Less than 30 minutes
Beginner
5 min read

How to Clean Fuel Injectors
1 to 2 hours
Beginner
8 min read

How to Replace Shock Absorbers
30 to 60 minutes
Beginner
8 min read
How to Change a Car Battery
Less than 30 minutes
Beginner
6 min read
Automation How to Change a Car Battery
Less than 30 minutes
Beginner
6 min read

How to Replace a Mass Air Flow (MAF) Sensor
Less than 30 minutes
Beginner
7 min read

How to Replace a Clutch Master Cylinder
1 to 2 hours
Beginner
11 min read

How to Flush and Change Engine Coolant
30 to 60 minutes
Beginner
6 min read
How to Replace a Distributor Cap and Rotor
30 to 60 minutes
Beginner
5 min read

How to Check Tire Pressure and Change a Tire
Less than 30 minutes
Beginner
9 min read

How to Replace a Fuel Filter
30 to 60 minutes
Beginner
7 min read

How to Replace a PCV Valve
30 to 60 minutes
Beginner
6 min read

How to Replace a Brake Caliper
1 to 2 hours
Beginner
7 min read

How to Replace an Idler Pulley
30 to 60 minutes
Beginner
4 min read

How to Change a Headlight Bulb
Less than 30 minutes
Beginner
6 min read

How to Replace an Exhaust Gasket
1 to 2 hours
Beginner
9 min read

How to Replace a Throttle Body
30 to 60 minutes
Beginner
6 min read

How to Change Oil in a Car
Less than 30 minutes
Beginner
8 min read
How to Replace an Alternator
1 to 2 hours
Beginner
11 min read

How to Replace an EGR Valve
30 to 60 minutes
Beginner
5 min read